
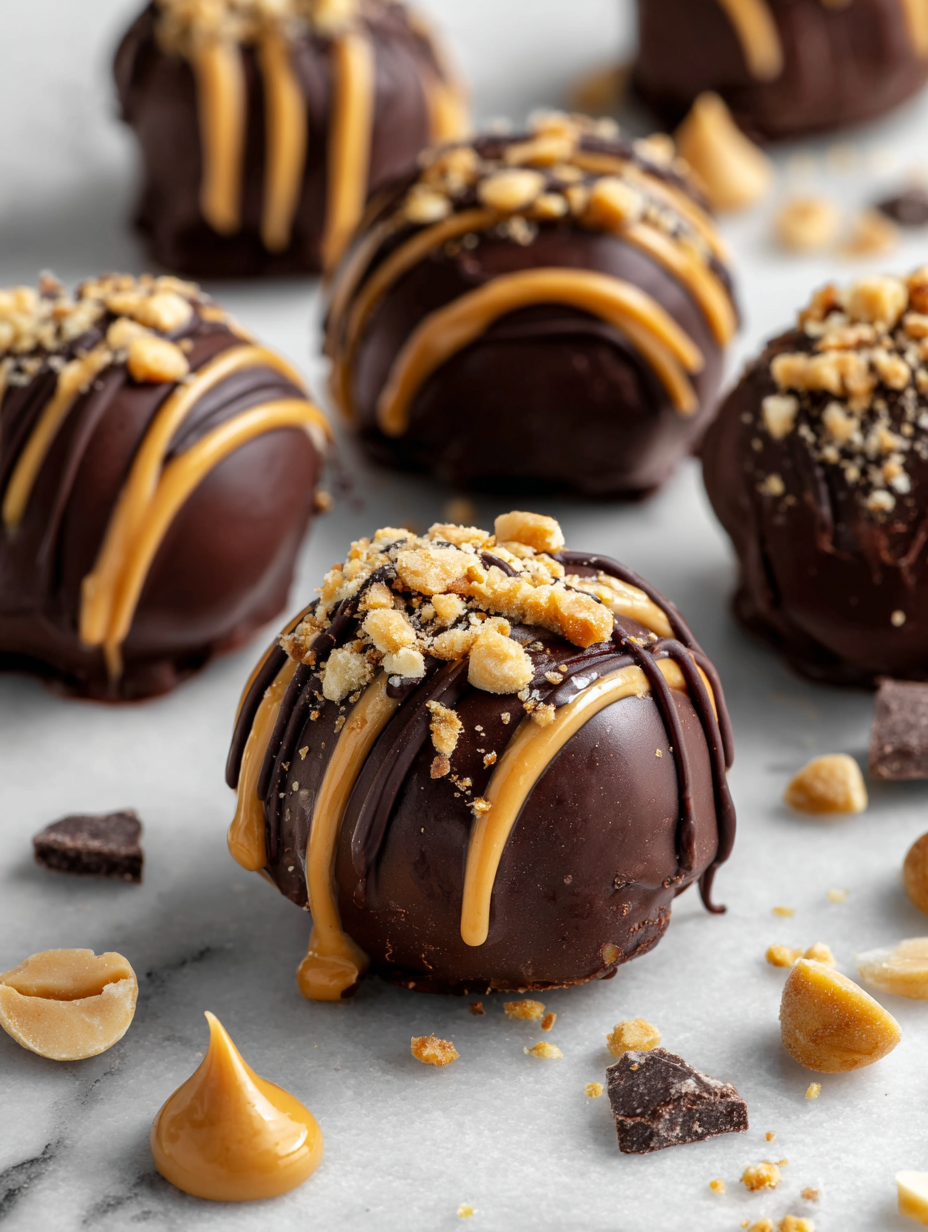
Making these chocolate peanut butter truffles is like holding a tiny piece of comfort in your palm. It’s a slow, tactile process that demands your attention, but it’s worth every moment of the smooth, sticky mix. There’s a quiet joy in rolling each into perfect little spheres, feeling the coolness of the chocolate and the richness of the peanut butter.
In a world that rushes past, these truffles invite a pause. They’re a reminder that simple ingredients, handled with care, can turn into something that’s both decadent and familiar. It’s not just about the taste but the ritual—the deliberate, almost meditative act of creating something sweet and satisfying.
A focus on the nostalgic, almost meditative act of making truffles by hand, emphasizing the tactile connection and mindfulness involved.
Why these truffles matter to me
- Making these connects me to childhood afternoons in my grandma’s kitchen.
- I love the slow, tactile process, it’s almost meditative.
- There’s a real satisfaction in rolling perfect little spheres.
- These truffles are my go-to when I need a quick, homemade gift.
- They remind me that simple ingredients can create something extraordinary.
Inspiration behind the recipe
- I first made these when I needed a comforting treat that didn’t require turning on the oven. The process of mixing, chilling, and shaping became a calming ritual.
- A friend’s comment about how they reminded her of childhood candies inspired me to perfect this recipe.
- I love experimenting with different coatings—crushed nuts, coconut flakes, or even a dusting of sea salt.
Contextual origin, trivia, or history in bullet list.
These truffles are inspired by classic European confections, but with a peanut butter twist.
The combination of chocolate and peanut butter was popularized in the U.S. during the 20th century, especially in candy bars.
Using cocoa powder instead of melted chocolate in the filling gives a more intense chocolate flavor without the extra sugar.
Chilling the mixture helps develop flavor and makes handling easier, especially during rolling.
Peanut butter’s natural oils can cause the mixture to soften; chilling stabilizes it, making rolling easier.
Ingredient breakdown: insights and tweaks
- Peanut Butter: I prefer natural, lightly salted peanut butter for authentic flavor. If you use sweetened, reduce sugar accordingly.
- Cocoa Powder: Unsweetened cocoa gives a rich, deep flavor. Dutched cocoa is milder; choose based on your taste preference.
- Butter: Use unsalted butter for better control of salt and flavor, but salted works in a pinch.
- Powdered Sugar: It dissolves easily, ensuring a smooth filling. Granulated sugar won’t blend as well.
- Chocolate (for coating): Opt for high-quality dark chocolate, it melts smoothly and adds a glossy finish.
Spotlight on key ingredients
Peanut Butter
- Peanut Butter: It’s the soul—rich, nutty, and slightly oily. Stir well to distribute oils evenly.
- It can be sticky, so chill before using, and choose smooth or chunky based on texture preference.
Cocoa Powder
- Cocoa Powder: It’s the backbone of the chocolate flavor—deep, bitter, with a hint of earthiness.
- Sift before measuring to remove lumps, ensuring a smooth, even coating.
Ingredient substitutions for dietary needs and flavor twists
- Dairy-Free: Use coconut cream instead of butter—creamy, slightly sweet, and coconutty.
- Nut-Free: Swap peanut butter for sunflower seed butter—less common but still rich and nutty.
- Vegan: Replace butter with coconut oil or vegan margarine—maintains richness, slightly different mouthfeel.
- Sugar Alternatives: Use maple syrup or honey in the filling—adjust consistency and sweetness.
- Chocolate Coating: Use carob chips or dairy-free chocolate—similar meltability, different flavor.
Unique step-by-step guide to making Chocolate Peanut Butter Truffles
Equipment & Tools
- Small saucepan: Melt butter and chocolate
- Mixing bowls: Combine ingredients
- Parchment paper: Prevent sticking and easy cleanup
- Melon baller or teaspoon: Portion out the mixture
- Toothpick or fork: Dip and coat the truffles
Step 1: Gather your ingredients: peanut butter, cocoa powder, butter, powdered sugar, and vanilla extract.
Step 2: Melt the butter in a small saucepan over low heat until just liquid. Remove from heat.
Step 3: In a mixing bowl, combine peanut butter, melted butter, cocoa powder, powdered sugar, and vanilla. Mix until smooth and thick.
Step 4: Chill the mixture in the fridge for about 30 minutes, until firm enough to handle.
Step 5: Scoop out small portions with a teaspoon or melon baller, roll into smooth balls between your palms.
Step 6: Place on a parchment-lined tray. Chill for another 30 minutes to set.
Step 7: Melt chocolate if you’re coating the truffles. Dip each ball, then place back on parchment.
Step 8: Let the chocolate set at room temp or in the fridge for 15-20 minutes.
Step 9: For a softer, chewier texture, skip the chocolate coating and serve as is.
Step 10: Store in an airtight container in the fridge for up to a week.
Step 11: Checkpoints:
Step 12: – The mixture is firm but pliable after chilling.
Step 13: – The chocolate coating is shiny and set.
Step 14: – The truffles hold shape when gently pressed.
Step 15: Equipment & Tools:
Step 16: – Small saucepan (for melting butter and chocolate)
Step 17: – Mixing bowls
Step 18: – Parchment paper (for setting)
Step 19: – Melon baller or teaspoon (for portioning)
Step 20: – Toothpick or fork (for dipping)
Chill the coated truffles in the fridge for the chocolate to set and develop a shiny finish.
How to Know It’s Done
- The mixture is firm but pliable after chilling.
- The chocolate coating is shiny and set.
- The truffles hold shape when gently pressed.
Cooking tips & tricks for perfect truffles
Temperature control: Keep your melted butter and chocolate low to prevent burning.
Handling: Use cold hands or wear gloves when rolling to prevent melting the mixture.
Flavor: Toast your peanuts lightly before blending for a deeper, smoky flavor.
Consistency: If the mixture is too sticky, add a bit more powdered sugar.
Dipping: Use a fork or skewer for even coating, then gently tap off excess chocolate.
Common mistakes and how to fix them
- FORGOT TO CHILL THE MIXTURE? Return it to the fridge for 15-20 minutes until firm.
- DUMPED CHOCOLATE? Re-melt gently, add a tiny splash of coconut oil to restore shine.
- OVER-TORCHED CHOCOLATE? Cool slightly before dipping, or it’ll seize and become lumpy.
- TRUFFLES ARE TOO SOFT? Chill longer or add a pinch more powdered sugar for firmness.
Quick kitchen fixes for common issues
When mixture is too soft, chill it longer or add a bit more cocoa powder.
Splash a tiny bit of warm water into melted chocolate if it’s too thick.
Patch cracking chocolate with a quick reheat, then stir until smooth.
Shield delicate truffles from humidity—keep in a cool, dry place.
When in doubt, refrigerate to firm up your truffles quickly.
Make-ahead and storage tips
The mixture can be prepared a day in advance, kept covered in the fridge.
Chilled truffles last up to a week in an airtight container in the fridge.
The flavors deepen overnight, making them even more decadent.
If freezing, wrap tightly and store for up to a month; thaw in fridge before serving.
Refrigerate or serve at room temperature for best texture and flavor.
10 practical Q&As: each bullet, bolded short question head, plain language, concrete, sensory if possible.
Can I use natural peanut butter? Yes, but it might affect the texture slightly; stir well before measuring.
What if I don’t have cocoa powder? Cocoa nibs or a bit of melted dark chocolate can work, but adjust the sweetness.
How long do these truffles keep? Store in an airtight container at room temp for 3 days or fridge for up to a week.
Can I freeze the truffles? Absolutely, wrap tightly and freeze for up to a month, then thaw in fridge.
Is there a dairy-free option? Use coconut cream instead of butter for a rich, dairy-free filling.
Can I make these vegan? Swap butter for coconut oil and use vegan chocolate or dark chocolate with no dairy.
What’s the best way to melt chocolate? Use a double boiler or microwave in short bursts, stirring until smooth.
How do I prevent the peanut butter from separating? Mix thoroughly before measuring, and keep ingredients at room temp.
Are these suitable for kids? Yes, but watch for allergies and use mild, unsweetened peanut butter.
How do I know when the filling is firm enough? It should be scoopable but hold shape when chilled.
Chocolate Peanut Butter Truffles
Ingredients
Equipment
Method
- Gather your ingredients: peanut butter, cocoa powder, powdered sugar, melted butter, vanilla, and chopped dark chocolate.
- In a small saucepan, melt the butter over low heat until just liquid and fragrant, then remove from heat.
- In a mixing bowl, combine the peanut butter, melted butter, cocoa powder, powdered sugar, and vanilla. Stir thoroughly until the mixture is smooth, thick, and uniform in color.
- Cover the bowl with plastic wrap or a lid and chill in the fridge for about 30 minutes, until the mixture firms up enough to handle.
- Using a teaspoon or melon baller, scoop out small portions of the chilled mixture and gently roll between your palms to form smooth, round balls.
- Place the formed truffles onto a parchment-lined tray, spacing them evenly. Chill for another 30 minutes to set.
- Meanwhile, melt the chopped dark chocolate in a microwave or double boiler until silky and smooth, stirring frequently.
- Using a fork or toothpick, dip each chilled truffle into the melted chocolate, turning gently to coat all sides. Tap off excess and place back on parchment paper.
- Allow the coated truffles to set at room temperature or in the fridge for 15-20 minutes until the chocolate is glossy and firm.
- Once set, enjoy these rich, decadent treats or store them in an airtight container in the fridge for up to a week.
Notes
They’re perfect for sharing, or not. Keep them in an airtight container, and they’ll keep your kitchen smelling like roasted peanuts and cocoa for days. Each bite is a small, rich moment—something to savor slowly, with a cup of coffee or a glass of milk.

Founded by Rachel Morgan, a proud home cook and foodie from Austin, Texas, this blog is all about transforming everyday meals into moments of joy.