
When I first started making cheese balls, I was lazy about the details. Just cheese, nuts, roll, serve. But over time, I realized the magic is in the small tweaks—the herbs, the spices, the texture contrast. It’s become my go-to for parties, but also a sneaky way to make a snack feel fancy.
This recipe isn’t about perfection or fuss. It’s about tasting as you go, adjusting with what you have, and embracing the messy joy of cheese and crunch. It’s a little chaos in a ball, and honestly, I love how forgiving it is.
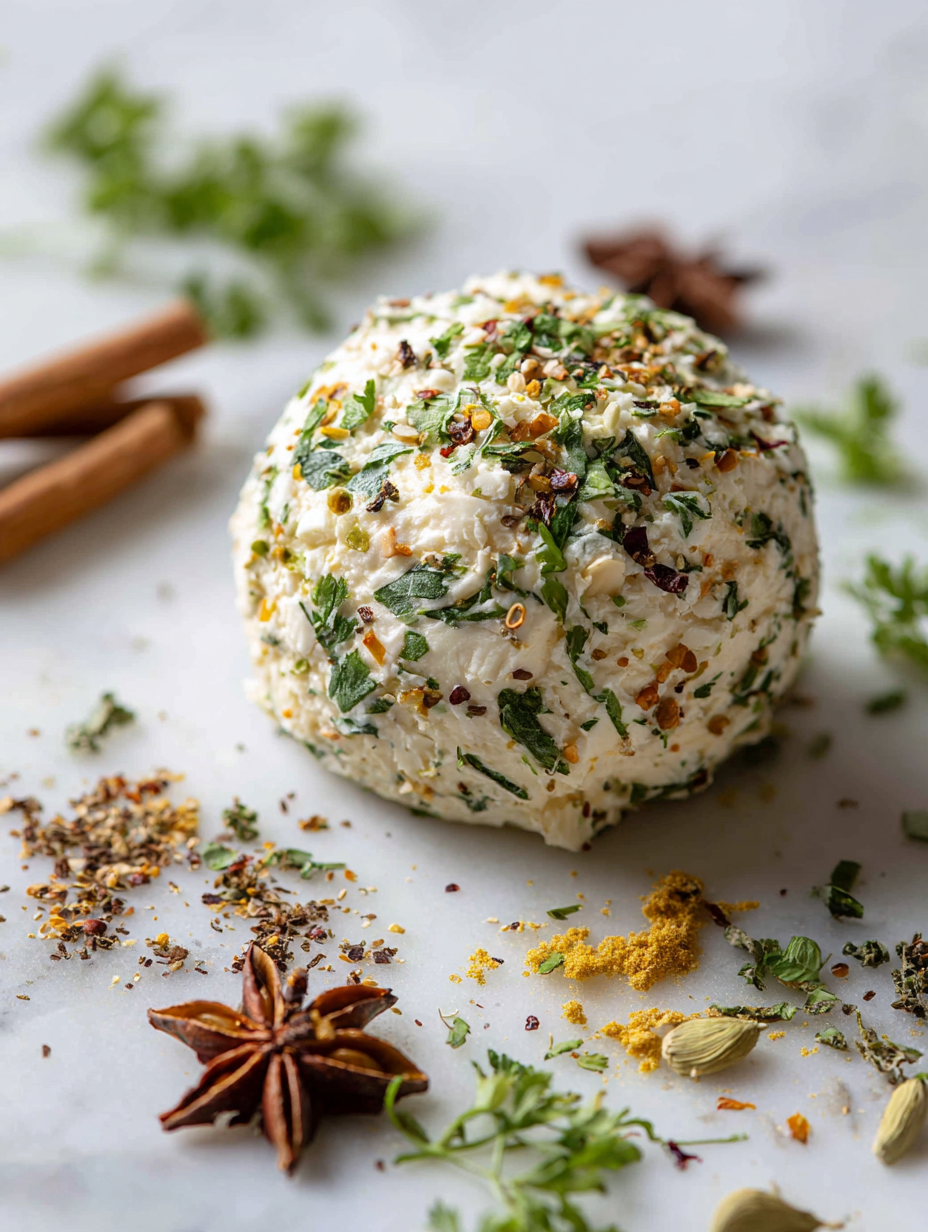
Unusual flavor twists—like adding a dash of smoky paprika or a sprinkle of za’atar—make a simple cheese ball feel special.
A Cheese Ball That Tells My Story
- Making this cheese ball feels like an act of love—messy, satisfying, a little chaotic.
- I’ve lost count of how many times I’ve thrown one together last minute, yet it’s always a hit.
- There’s something comforting about the creamy, crunchy combo that never gets old.
- It’s a recipe that’s forgiving—perfect for improvising with what’s in the fridge.
My Inspired Cheese Ball Journey
- This recipe was born out of a lazy Sunday experiment, trying to salvage some odds and ends in my fridge.
- I added a splash of smoked paprika, and that smoky warmth made all the difference.
- From then on, I started customizing with different herbs and spices, making it my own.
Cheese Ball: A Brief History and Fun Facts
Cheese balls date back to the 19th century, originally served at elegant parties in Europe.
The name ‘cheese ball’ became popular in the US during the 1950s as a party appetizer.
Traditionally, they were coated in nuts or herbs to hide imperfections and add flavor.
Using different cheeses can dramatically change the flavor profile—think smoky, spicy, or tangy.
Adding a touch of whiskey or hot sauce can give a surprising kick, inspired by classic cocktail flavors.
Ingredient Insights & Tweaks
- Cream cheese: The base—makes it creamy and easy to shape. Goes well with everything, but sour cream can be a tangy swap.
- Cheddar cheese: Adds sharpness and richness—use smoked cheddar for a smoky twist or a milder cheese for subtlety.
- Herbs: Fresh parsley, chives, or thyme—bring brightness and freshness. Dried herbs work but lack vibrancy.
- Nuts: Walnuts, pecans, or almonds—add crunch and richness. Toast first for extra flavor.
- Spices: Paprika, cayenne, or za’atar—layer flavors and add visual appeal. Use smoked paprika for depth.
Key Ingredients That Make or Break Your Cheese Ball
Herbs: Fresh herbs are vibrant, fragrant, and essential for that fresh kick. Chop finely for even distribution.
- Cream cheese: It’s the canvas—soft, velvety, melts in your mouth. Keep it softened for easy mixing.
- Nuts: Crunchy and toasty—toast them lightly to unlock their full aroma.
Nuts: They’re the surprise crunch—try pecans for buttery richness or almonds for a sturdy bite.
- Cheddar cheese: Sharp and cheesy—melts smoothly, adding depth. Use aged cheddar for more punch.
- Spices: Smoked paprika or cayenne—smoky, spicy notes that lift the whole ball. Toast spices briefly to release aroma.
Smart Ingredient Swaps for Your Cheese Ball
- Dairy-Free: Use dairy-free cream cheese—creamy but less rich, a good vegan option.
- Cheese Variations: Swap cheddar for pepper jack for spice, or Swiss for nuttiness.
- Herbs: Dried herbs work in a pinch but lack brightness—use fresh if possible.
- Nuts: Sunflower seeds or pumpkin seeds—less traditional but add crunch and flavor.
- Spices: Curry powder or cumin—bring warmth and earthiness, switching up the flavor profile.
Step-by-Step Guide to a Perfect Cheese Ball
Equipment & Tools
- Mixing bowl: Combine ingredients evenly.
- Spatula: Mix and shape the cheese mixture.
- Plastic wrap: Wrap the cheese ball for chilling.
- Serving plate: Display the finished cheese ball.
Step 1: Gather your ingredients and tools: mixing bowl, spatula, plastic wrap, and a plate for rolling.
Step 2: In a large bowl, soften the cream cheese in the microwave for 20 seconds until just pliable.
Step 3: Mix in shredded cheese, herbs, spices, and a pinch of salt. Stir until well combined.
Step 4: Shape the mixture into a rough ball with your hands. If it’s too sticky, chill for 10 minutes.
Step 5: Roll the ball in chopped nuts, paprika, or herbs. Press gently so they stick.
Step 6: Wrap tightly in plastic wrap. Chill in the fridge for at least 2 hours, or overnight for stronger flavor.
Step 7: Before serving, let sit at room temp for 15 minutes to soften slightly.
Step 8: Slice with a warm knife for neat cuts. Serve with crackers or veggie sticks.
Wrap in plastic and chill for at least 2 hours, then bring to room temp before serving.
How to Know It’s Done
- Cheese mixture is firm but pliable—test by pressing with a finger.
- Nuts or herbs stick easily—if not, press them onto the surface firmly.
- Cheese ball holds shape when chilled—if it’s too soft, chill longer or add more cheese.
Cooking Tips & Tricks for a Better Cheese Ball
HERBS: Finely chop fresh herbs to distribute flavor evenly.
SPREAD: Use a warm knife to slice for cleaner cuts.
TEXTURE: Chill the mixture before rolling for better shaping.
FLAVOR: Add a dash of Worcestershire or hot sauce for depth.
TECHNIQUE: Toast nuts lightly to enhance their flavor.
Common Mistakes & How to Fix Them
- FORGOT TO CHILL? Chill the mixture for 30 minutes before shaping.
- DUMPED TOO MUCH SPICE? Rinse the surface of the ball with cold water and recoat.
- OVER-TORCHED NUTS? Use a lower heat next time; toast for less time.
- POORLY STICKING HERBS? Lightly dampen herbs before pressing onto the surface.
Quick Kitchen Fixes for Common Cheese Ball Woes
When mixture is too soft, add more shredded cheese or chill longer.
If nuts aren’t sticking, dab the surface with a tiny bit of water or egg wash.
Splash a little hot sauce or lemon juice to brighten bland cheese.
Patch cracks with extra herbs or nuts before serving.
Shield the cheese ball from drying out by wrapping tightly in plastic.
Make-Ahead & Storage Tips
Prep the cheese mixture a day in advance; it tastes better after resting.
Wrap tightly and keep in the fridge for up to 24 hours—flavors deepen.
The cheese ball can be frozen for up to a month, but texture may soften slightly.
Bring it to room temp before serving for the best flavor and texture.
Re-roll in nuts or herbs if it’s been stored for a while to refresh the exterior.
Why This Cheese Ball Matters to Me
What makes this cheese ball different? It’s not just a lump of cheese—it’s packed with unexpected herbs and a spicy kick.
Can I use different cheeses? Yes, mix sharp cheddar with smooth cream cheese for a balance of tang and creaminess.
How long should I chill it? At least 2 hours, but overnight is better to let flavors meld.
Is it okay to roll it in something other than nuts? Absolutely, try chopped herbs, paprika, or crushed pretzels.
Can I make this ahead? Yes, up to 24 hours in advance, wrap tightly and keep refrigerated.
What’s a good party size? About 8-10 people—it’s rich, so a little goes a long way.
How do I fix a runny cheese mixture? Add more cream cheese or chill for 30 minutes to firm it up.
Can I freeze this? Yes, wrapped tightly, it keeps for 1 month, but texture may change slightly.
What’s a good accompaniment? Fresh-cut veggies, crispy baguette slices, or sturdy crackers.
How do I serve it? Bring it to room temp before serving for full flavor and easier spreading.
Herb and Spice Cheese Ball
Ingredients
Equipment
Method
- In a mixing bowl, soften the cream cheese until it's smooth and creamy, about 20 seconds in the microwave.
- Add the shredded cheddar cheese, freshly chopped herbs, smoked paprika, salt, and a pinch of pepper to the bowl.
- Use a spatula to mix everything together until well combined and the mixture is smooth, fragrant, and slightly sticky.
- With clean hands, shape the cheese mixture into a rough ball, pressing gently to form a firm, cohesive shape.
- Spread the chopped toasted nuts on a plate or in a shallow dish.
- Roll the cheese ball gently in the nuts, pressing lightly to help the nuts adhere evenly around the surface.
- Wrap the cheese ball tightly in plastic wrap and refrigerate for at least 2 hours, or overnight, to let the flavors meld and the shape firm up.
- Once chilled, remove the cheese ball from the fridge and let it sit at room temperature for about 15 minutes before serving.
- Place the cheese ball on a serving plate and garnish with additional herbs or nuts if desired.
- Slice with a warm knife and serve with crackers, bread, or fresh vegetables for a delightful, flavorful appetizer.
Notes
Whenever I make it, I feel a little proud. It’s honest, approachable, and perfect for when you want something satisfying without fuss. No matter the occasion, it’s a little reminder that good flavor comes from honest tweaking and loving what you’re making.

Founded by Rachel Morgan, a proud home cook and foodie from Austin, Texas, this blog is all about transforming everyday meals into moments of joy.